
Ever wonder why restaurant cheesesteaks taste better than homemade ones? The secret isn’t just the cheese or bread—it’s in how the chicken is sliced. If your chicken is too thick, it won’t cook evenly or absorb flavors properly. Mastering how to shave chicken breast for cheesesteak will help you create the perfect sandwich every time.
In this guide, you’ll learn the best slicing techniques, essential tools, and storage tips to ensure your chicken is always cut to perfection. Once you’ve mastered how to shave chicken breast for cheesesteak, it’s time to cook it to perfection. Follow this chicken cheesesteak recipe for step-by-step instructions on seasoning and assembling the perfect sandwich.
Want to take your cheesesteak skills to the next level? Discover the Philly Cheesesteak Secret for insider techniques on achieving the most authentic flavors.
Now, let’s dive into the step-by-step process of shaving chicken breast for cheesesteak like a pro.
Why Shaving Chicken Breast is a Game-Changer
The Downside of Thick Cuts
Many home cooks make the mistake of slicing their chicken into thick chunks, thinking it will stay juicier. However, this leads to:
- Uneven cooking – Some pieces may be overcooked while others remain raw.
- Chewy texture – Thick cuts don’t absorb seasoning well.
- Poor cheese integration – Instead of a creamy, cohesive blend, you end up with separate layers of cheese and meat.
The Benefits of Shaved Chicken
Thinly sliced chicken, on the other hand:
✔ Cooks quickly and evenly
✔ Absorbs seasonings and sauces more effectively
✔ Blends seamlessly with cheese and toppings
If you want to achieve a restaurant-quality cheesesteak, mastering this technique is a must. Also, if you’re cooking chicken in other ways, you might wonder: Is it okay to put raw chicken in a slow cooker?
Best Knives for Shaving Chicken Breast
Choosing the right knife is essential for getting thin, even slices of chicken breast. The right blade ensures precision, control, and consistency, making it easier to achieve restaurant-quality results. Here are the best knives for shaving chicken breast:
1. Chef’s Knife (8-10 inches) – The Best All-Around Choice
A sharp chef’s knife is the most versatile tool for shaving chicken breast. With a long, straight-edged blade, it allows for smooth, controlled strokes without tearing the meat. Look for a well-balanced, high-carbon steel knife to maintain sharpness over time.
Best for:
- Home cooks who want a single, multipurpose knife
- Controlled slicing with long, even strokes
- Maintaining precision and consistency
2. Boning Knife – Great for Prepping and Trimming
A boning knife has a thin, flexible blade, making it perfect for trimming excess fat and cartilage before shaving the chicken. Though it is not designed for large slicing movements, it helps create a clean, prep-ready piece of chicken before you begin slicing.
Best for:
- Trimming fat, tendons, or connective tissue
- Preparing the chicken breast for slicing
- Cooks who prefer a lightweight, maneuverable knife
3. Santoku Knife – Perfect for Ultra-Thin Slices
A Santoku knife is a Japanese-style knife known for its flat edge and Granton (dimples) design, which prevents meat from sticking to the blade. Its shorter, straighter blade makes it ideal for precision slicing, allowing for clean, ultra-thin cuts without tearing the meat.
Best for:
- Achieving paper-thin slices
- Cutting with minimal resistance
- Those who prefer a lightweight, easy-to-control knife
4. Avoid Serrated Knives – They Tear the Meat
A serrated knife may seem useful for slicing, but it actually tears the chicken fibers instead of cutting cleanly. This results in uneven, jagged slices that do not cook evenly and have an unpleasant texture. Always opt for a sharp, smooth-edged knife instead.
Why to avoid serrated knives:
- They shred and tear chicken instead of slicing smoothly
- Uneven cuts lead to inconsistent cooking
- Harder to control compared to a straight-edged knife
Final Knife Recommendation
For most home cooks, a sharp 8-10 inch chef’s knife is the best all-around option for shaving chicken breast. If you want even more precision, a Santoku knife provides ultra-thin slices, while a boning knife helps with prep work. Avoid serrated knives, as they will make slicing more difficult.
Now, let’s break down exactly how to shave chicken breast like a pro.
Step-by-Step Guide to Shaving Chicken Breast for Cheesesteak
Step 1: Prepping the Chicken for Easy Slicing
Before you start slicing, proper preparation is key.
Selecting the Right Chicken
- Fresh, boneless, skinless chicken breast is ideal.
- Avoid frozen chicken unless thawed completely, as the texture may be inconsistent.
- Organic or free-range chicken tends to be more tender and flavorful.
How to Chill Chicken for Easy Slicing
- Place the chicken breast in the freezer for 20-30 minutes until it firms up slightly.
- The texture should be firm but not rock-hard—think of slicing semi-frozen butter.
- If working with multiple chicken breasts, keep the others in the freezer while you slice one at a time.
Essential Tools for Shaving Chicken
To achieve paper-thin slices, you need the right equipment:
✔ Sharp Chef’s Knife – A long, smooth-edged knife works best. Serrated knives tear the meat rather than slicing it cleanly.
✔ Cutting Board – Use a stable, non-slip surface for safety.
✔ Meat Slicer or Mandoline (Optional) – If available, these tools help create uniform slices effortlessly.
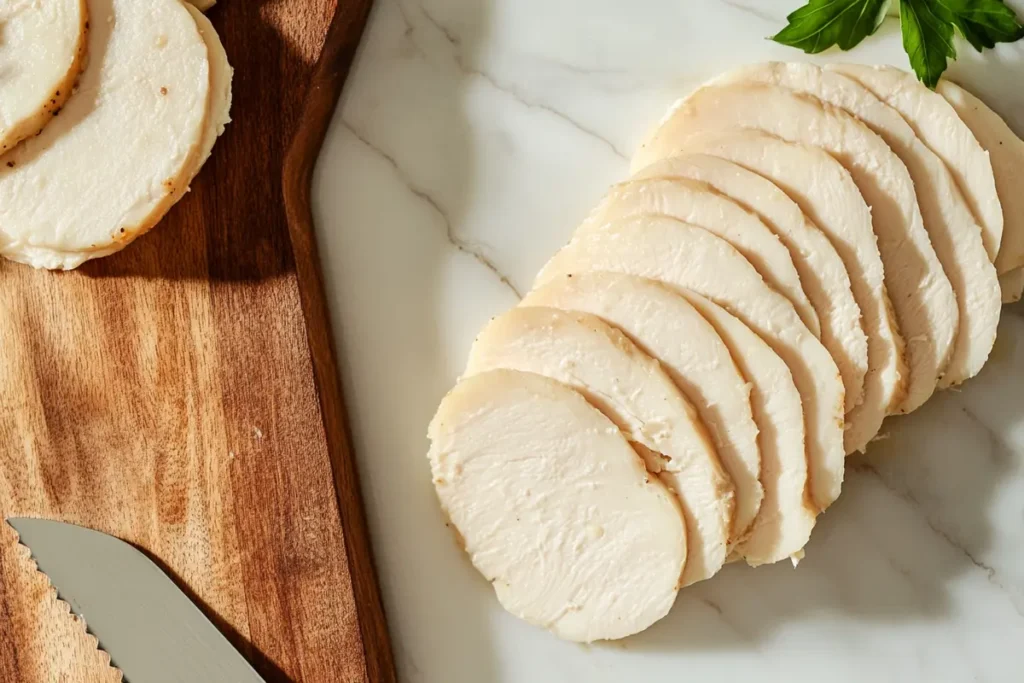
Step 2: Mastering the Technique – How to Shave Chicken Breast for Cheesesteak
Getting the perfect thin slices is essential for an authentic cheesesteak. Let’s break down how to shave chicken breast for cheesesteak properly.
Proper Hand Positioning for Safety
- Place the chicken flat on the cutting board.
- Use your non-dominant hand to gently press down, keeping fingers curled away from the blade.
- Hold the knife at a 30-degree angle for controlled slicing.
Knife Technique for Ultra-Thin Slices
- Start at one end and use smooth, controlled strokes—avoid sawing motions.
- Apply consistent pressure to create even, delicate strips no thicker than 1/8 inch.
- If a slice is too thick, place it flat and carefully slice it in half.
Alternative Methods for Efficiency
- Meat Slicer: If you have one, adjust it to the thinnest setting for uniform slices.
- Mandoline: Use with caution to create even, thin strips quickly.
Common Mistakes & How to Fix Them
1. Freezing the Chicken Too Long
Mistake: You left the chicken in the freezer too long, and now it’s rock-hard.
Fix: Let it sit at room temperature for 5 minutes before slicing. It should be firm, not frozen solid.
2. Cutting Uneven Slices
Mistake: Some pieces are thick, others are too thin. This makes the chicken cook unevenly.
Fix: Hold the knife at a 30-degree angle and slice against the grain. Use smooth, even strokes.
3. Using the Wrong Knife
Mistake: Using a dull or serrated knife results in uneven, torn chicken slices.
Fix: Use a sharp chef’s knife with a straight edge for smooth, precise cuts.
How to Store and Preserve Shaved Chicken Breast
Once you have properly shaved your chicken breast, storing it correctly will help maintain its texture, flavor, and freshness. Whether you plan to use it within a few days or freeze it for later, following the right storage methods will prevent spoilage and ensure high-quality results.
Refrigeration (Short-Term Storage)
If you plan to use your shaved chicken within a few days, refrigeration is the best option.
- Use an Airtight Container: Store the shaved chicken in a sealed container or a zip-top bag to prevent moisture loss and contamination.
- Keep at the Right Temperature: Place the container in the coldest part of your refrigerator (usually the back) at 40°F (4°C) or below.
- Use Within 2-3 Days: Shaved chicken has a larger surface area, so it spoils faster than whole pieces.
Tip: If marinating, store the chicken in the marinade to allow the flavors to develop while keeping it moist.
Freezing (Long-Term Storage)
If you need to store your shaved chicken for longer, freezing is the best way to maintain its texture and prevent spoilage.
- Flash-Freeze to Prevent Clumping:
- Spread the shaved chicken in a single layer on a baking sheet lined with parchment paper.
- Freeze for one hour until slightly firm.
- This step ensures the pieces do not stick together, making it easier to use only the amount you need later.
- Transfer to a Freezer Bag or Airtight Container:
- Once frozen, place the chicken in a freezer-safe bag or container.
- Remove as much air as possible to prevent freezer burn.
- Label with Date:
- Write the freezing date on the bag to keep track of freshness.
- Use within three months for the best quality.
Tip: If you plan to use the chicken for multiple meals, portion it into smaller bags for easy thawing and meal prep.
Best Methods for Thawing Shaved Chicken Safely
Thawing your frozen chicken correctly is essential to maintaining its texture and food safety.
Refrigerator Thawing (Best Method – Recommended)
- Transfer the frozen shaved chicken to the refrigerator and let it thaw overnight.
- This gradual thawing prevents moisture loss and keeps the chicken tender.
- Use within 24 hours after thawing for the best quality.
Avoid These Thawing Mistakes:
- Do not thaw at room temperature, as this can cause bacterial growth.
- Avoid using hot water, as this can make the chicken mushy and unevenly thawed.
Tip: If you need to cook the chicken immediately, you can cook it straight from frozen—just add a few extra minutes to the cooking time.
Marinating Before Freezing for Extra Flavor
If you want more flavorful chicken, marinate it before freezing so it absorbs seasonings as it thaws.
- Choose a Marinade: Use a mix of oil, acid (lemon juice or vinegar), and spices.
- Coat the Shaved Chicken Evenly: Place the chicken in a freezer bag with the marinade and massage to coat.
- Freeze Immediately: Store as usual.
- Thaw and Cook: As the chicken thaws in the fridge, it will absorb the marinade, leading to deeper, richer flavors.
Tip: Avoid marinades with too much salt or citrus if freezing for long periods, as they can change the texture of the chicken.
How to Keep Shaved Chicken Fresh for Longer
- Always label storage bags with the date to track freshness.
- Store raw and cooked shaved chicken separately to prevent cross-contamination.
- If the chicken develops an off smell, slimy texture, or discoloration, discard it immediately.
By following these proper storage, thawing, and marination techniques, your shaved chicken will stay fresh, flavorful, and ready to use whenever you need it.
FAQs
Should I slice chicken before or after freezing?
It is best to shave the chicken before freezing. Pre-slicing allows for quicker meal prep and ensures even cooking. If slicing after freezing, thaw it slightly until firm, then proceed with slicing.
Can You Use Pre-Cooked Chicken for Cheesesteak?
Fresh, raw chicken works best for shaving and cooking evenly. Pre-cooked chicken tends to dry out.
Can I use frozen shaved chicken directly in a cheesesteak?
Yes, but for the best texture, it’s recommended to thaw it first. If cooking from frozen, add extra time to ensure it cooks through.
Should I slice chicken breast with or against the grain?
Always slice against the grain for the most tender texture. Cutting with the grain results in long, chewy fibers that make the chicken tough. To identify the grain, look for the natural lines running through the chicken breast—slice perpendicular to these lines for the best results.